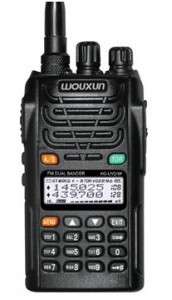
Programming the Wouxun KG-UVD1P

The confusing part with the Wouxun radio is the programming due to it’s ‘mode’ concept.
There are multiple modes to the Wouxun. Think of them as being in VFO mode or memory mode to relate to a ‘normal’ amateur handheld approach.
To program a repeater, do the following.
-
Turn on the Wouxun.
-
Press the green TDR button once. This is simply to put the display into single channel mode, just makes the display less confusing.
-
Press menu 2 1 menu
Do that right in order, literally “menu 2 1 menu”
Then rotate the selector knob to FREQ and hit menu again.
“menu” puts you into menu mode, the selector knob toggles which menu, menu again puts you into the active mode on that selection. When you make a change you must hit menu again after doing so for the change to be saved.
Now we are in “frequency mode” , this is basically VFO mode as with any other ‘normal’ amateur HT approach.
Now enter in your data.
- 1 4 6 5 2 5
Just as an example. This will be your repeater output frequency
Set your offset/shift
- Press menu 2 4 menu and rotate the selector for + or - or skip this step if you are doing a simplex frequency.
After you have it selected, hit menu again to save the change.
Now you have your offset direction programmed. If you key the HT now, you will see the TX frequency in the display for the offset direction you programmed. The Wouxun doesn’t have built in auto offsets so you manually configure the offset with menu23.
To do a manual offset do the following
- menu 2 3 menu Then enter in your offset (600 for VHF 5000 for UHF and so on), and hit menu again to save
You should now have your offset all configured.
Next is to set up the PL tone for transmit
- menu 1 6 menu then selector knob to the PL you want, then menu again to save it
If you want CTCSS, tone encoded squelch decode do
- menu 1 5 menu then selector knob to the PL for CTCSS squelch decode.
Now you want to save to a channel.
- menu 2 7 menu rotate the selector knob until you see an empty channel to use. Filled channels look like CH-001 where if it was empty it would just show you a 01. Press menu again when you want to save it to the slot selected.
Now this is where it gets a bit weird…you just saved into CH-001. You now need to put the HT into “NAME” mode to label the channel with alpha tags.
- menu 2 1 menu rotate the selector to NAME mode and hit menu again
Now turn the selector knob to the new channel, in this case you only have one CH-001. You MUST have the channel selected in NAME mode to now label it.
- Now do menu 2 6 menu The up arrow cycles the letters in order, hold it down to fast cycle, hit it once at a time to go letter by letter. The down arrow moves over one space in the name. This is a bit tricky to get used to. Once you get the name in, quickly hit menu again to save it, or you’ll have to start over. You’ll probably screw this part up :-).
So the shorthand to label the frequency is
-
menu 2 1 menu select NAME menu
-
menu 2 6 menu select the name you want to use and hit menu
Now when menu 21 is in NAME mode you will see what you set as the alpha tag instead of the CH-XXX name.
If you want to see the frequencies with a channel number do
- menu 2 1 menu and set it to CHFREQ.
If you just want channel numbers,
- menu 2 1 menu CH menu. Menu 21 in FREQ mode is putting the radio into VFO mode.
Don’t forget, menu puts you into the menu, selector switches menus, menu again activates that menu, then you change it, then menu AGAIN saves what you did.
I hope this helps someone.
73